This tutorial assists you on how to use the M5 platform to create a view that displays data from two different forms.
1.1 Displaying data from multiple forms
Setting up the sample objects
To run this example, you must first create the sample form. Please follow the steps below to do so.
Login to the M5 portal
Create a new application. In your home application, click Create a new form...

Name the form Test Form M5. Leave it the default for the rest

Click Create Form

Click Form Design & Layout

In this form, create a singleline text fields (named Test Field A)

Click Create field

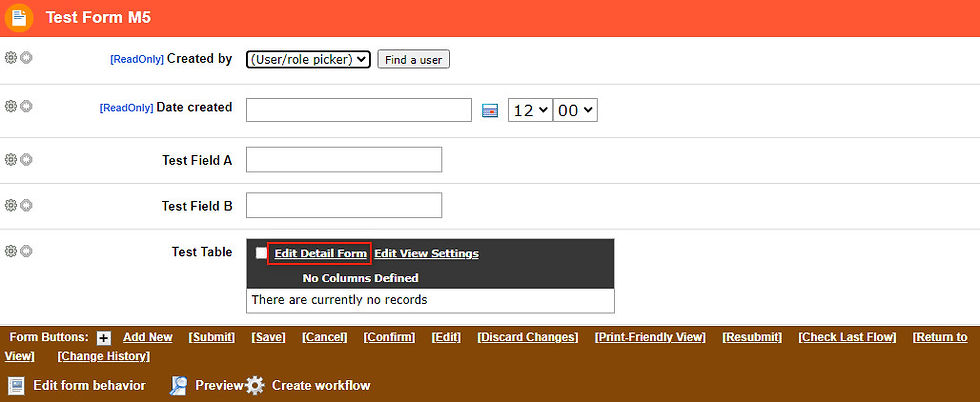
Repeat step 6 and 7 to create another text field (named Test Field B). Your form should like this:

In the same form, create a table named Test Table

Click Create field

In this table, click Edit Detail Form to create two fields (Test Subfield A and Test Subfield B)

You should now have the following:

Now publish this form by clicking on Publish and return at the bottom of the page

Click Generate now to generate a views for this form

Go to your app home then run this application. Click Run

Key a record into the form, and specify two rows inside Test Table. You should now have the screen shown in the following screenshot. Save the record.

Inspecting the default generated view
When you publish the form above, it will generate a default view. Navigate to the application home and choose to edit the default Test Form M5 view. Click Test Form M5 view

If you choose to edit the Datasource for the view, you will be presented with the screen shown in the following screenshot.


If you run the application and open the view, it will only show 2 columns (the two columns from your parent form), as shown below:

What you want to do now is to display the subform columns (Test Subfield A and Test Subfield B) in this same view. We will explore this in the next section.
Modifying the view to include 2 additional columns
What you've created so far above is a form and a table within a form. This translates in M5 to two forms - the parent "Test Form M5" and the child "Test Table" form. The
data is stored in two separate tables. The screenshot below illustrates the relationship between these two generated tables:

Follow the steps below to add the two additional columns to your view.
Click to edit the datasource of the view
Choose Define fields by SQL. Write your sql then click Retrieve columns
E.g SQL:
SELECT * FROM (
SELECT [QF_Test_Form].[ID],[QF_Test_Form].[Test Field A], [QF_Test_Form].[Test Field B],[SF_Test Table].[Test Subfield A] AS [Test subfield A],[SF_Test Table].[Test subfield B] AS [Test subfield B], ROW_NUMBER() OVER ( ORDER BY [QF_Test_Form].[ID] ASC) AS 'SqlRowNum'
FROM [QF_Test_Form]
INNER JOIN [SF_Test Table] ON [SF_Test Table].[ParentID] = [QF_Test_Form].[ID]) AS x
WHERE SqlRowNum>=1 AND SqlRowNum<=20 ORDER BY [ID] ASC
3. You should now have the screen shown below.

4. Save the changes to the view.
These few steps actually to creating an INNER JOIN between the two tables. You may notice at this point that you can actually run the view, and that it'll work.
Run your view, you should be able to see all the parent rows matched with the child table rows, as shown in the Figure below.

Comments